Developing Hadoop Projects in Eclipse
31 Jan 2014I’ve started learning the Apache Hadoop platform recently with a great book; Hadoop: The Definitive Guide. I had written some examples in terminal, but the projects were getting bigger and bigger. Eventually, I decided to switch to an IDE and started using Eclipse. Below I will explain two different ways to start your Hadoop Eclipse project in standalone mode.
##Importing Libraries
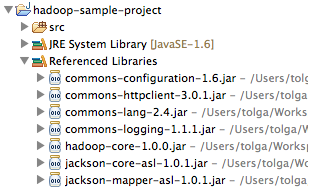
Create a new project and add these libraries as a reference to your project.
- commons-configuration-1.6.jar
- commons-httpclient-3.0.1.jar
- commons-lang-2.4.jar
- commons-logging-1.1.1.jar
- hadoop-core-1.0.0.jar
- jackson-core-asl-1.0.1.jar
- jackson-mapper-asl-1.0.1.jar
Add your source folder and you are ready to start your MapReduce application!
##Using Maven
First you need to create a pom.xml file. You can get it from my repository on github.
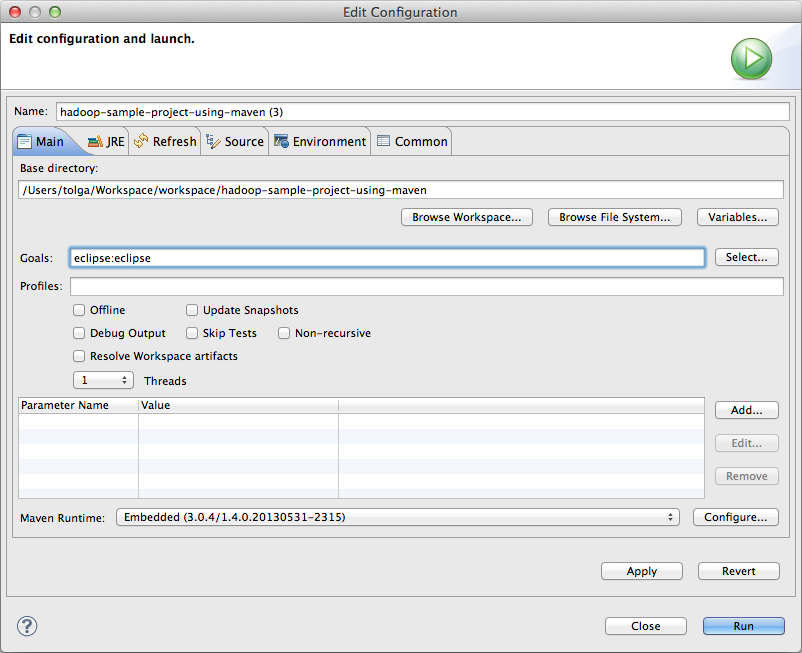
After getting the pom.xml, you can create your Eclipse project with the following command.
mvn eclipse:eclipse
Alternatively you can start a Java project in Eclipse, add pom.xml file to your project, right click your pom.xml and select Run as > Maven Build. Then you should write eclipse:eclipse to the Goals section and hit Run.
After the build is completed, right click on your project and Refresh your project. You should see the added libraries in the Referenced Libraries section.
Now, you can run your application.